Site management feature allows you to model your physical space within the Technis platform. Sites contain the logical structure of how your space is organized and what are the key areas (zones) that you want to track.
How counting works
Understanding how counting works at Technis will help you better plan configuration of your site.
First, let's recap the key concepts:
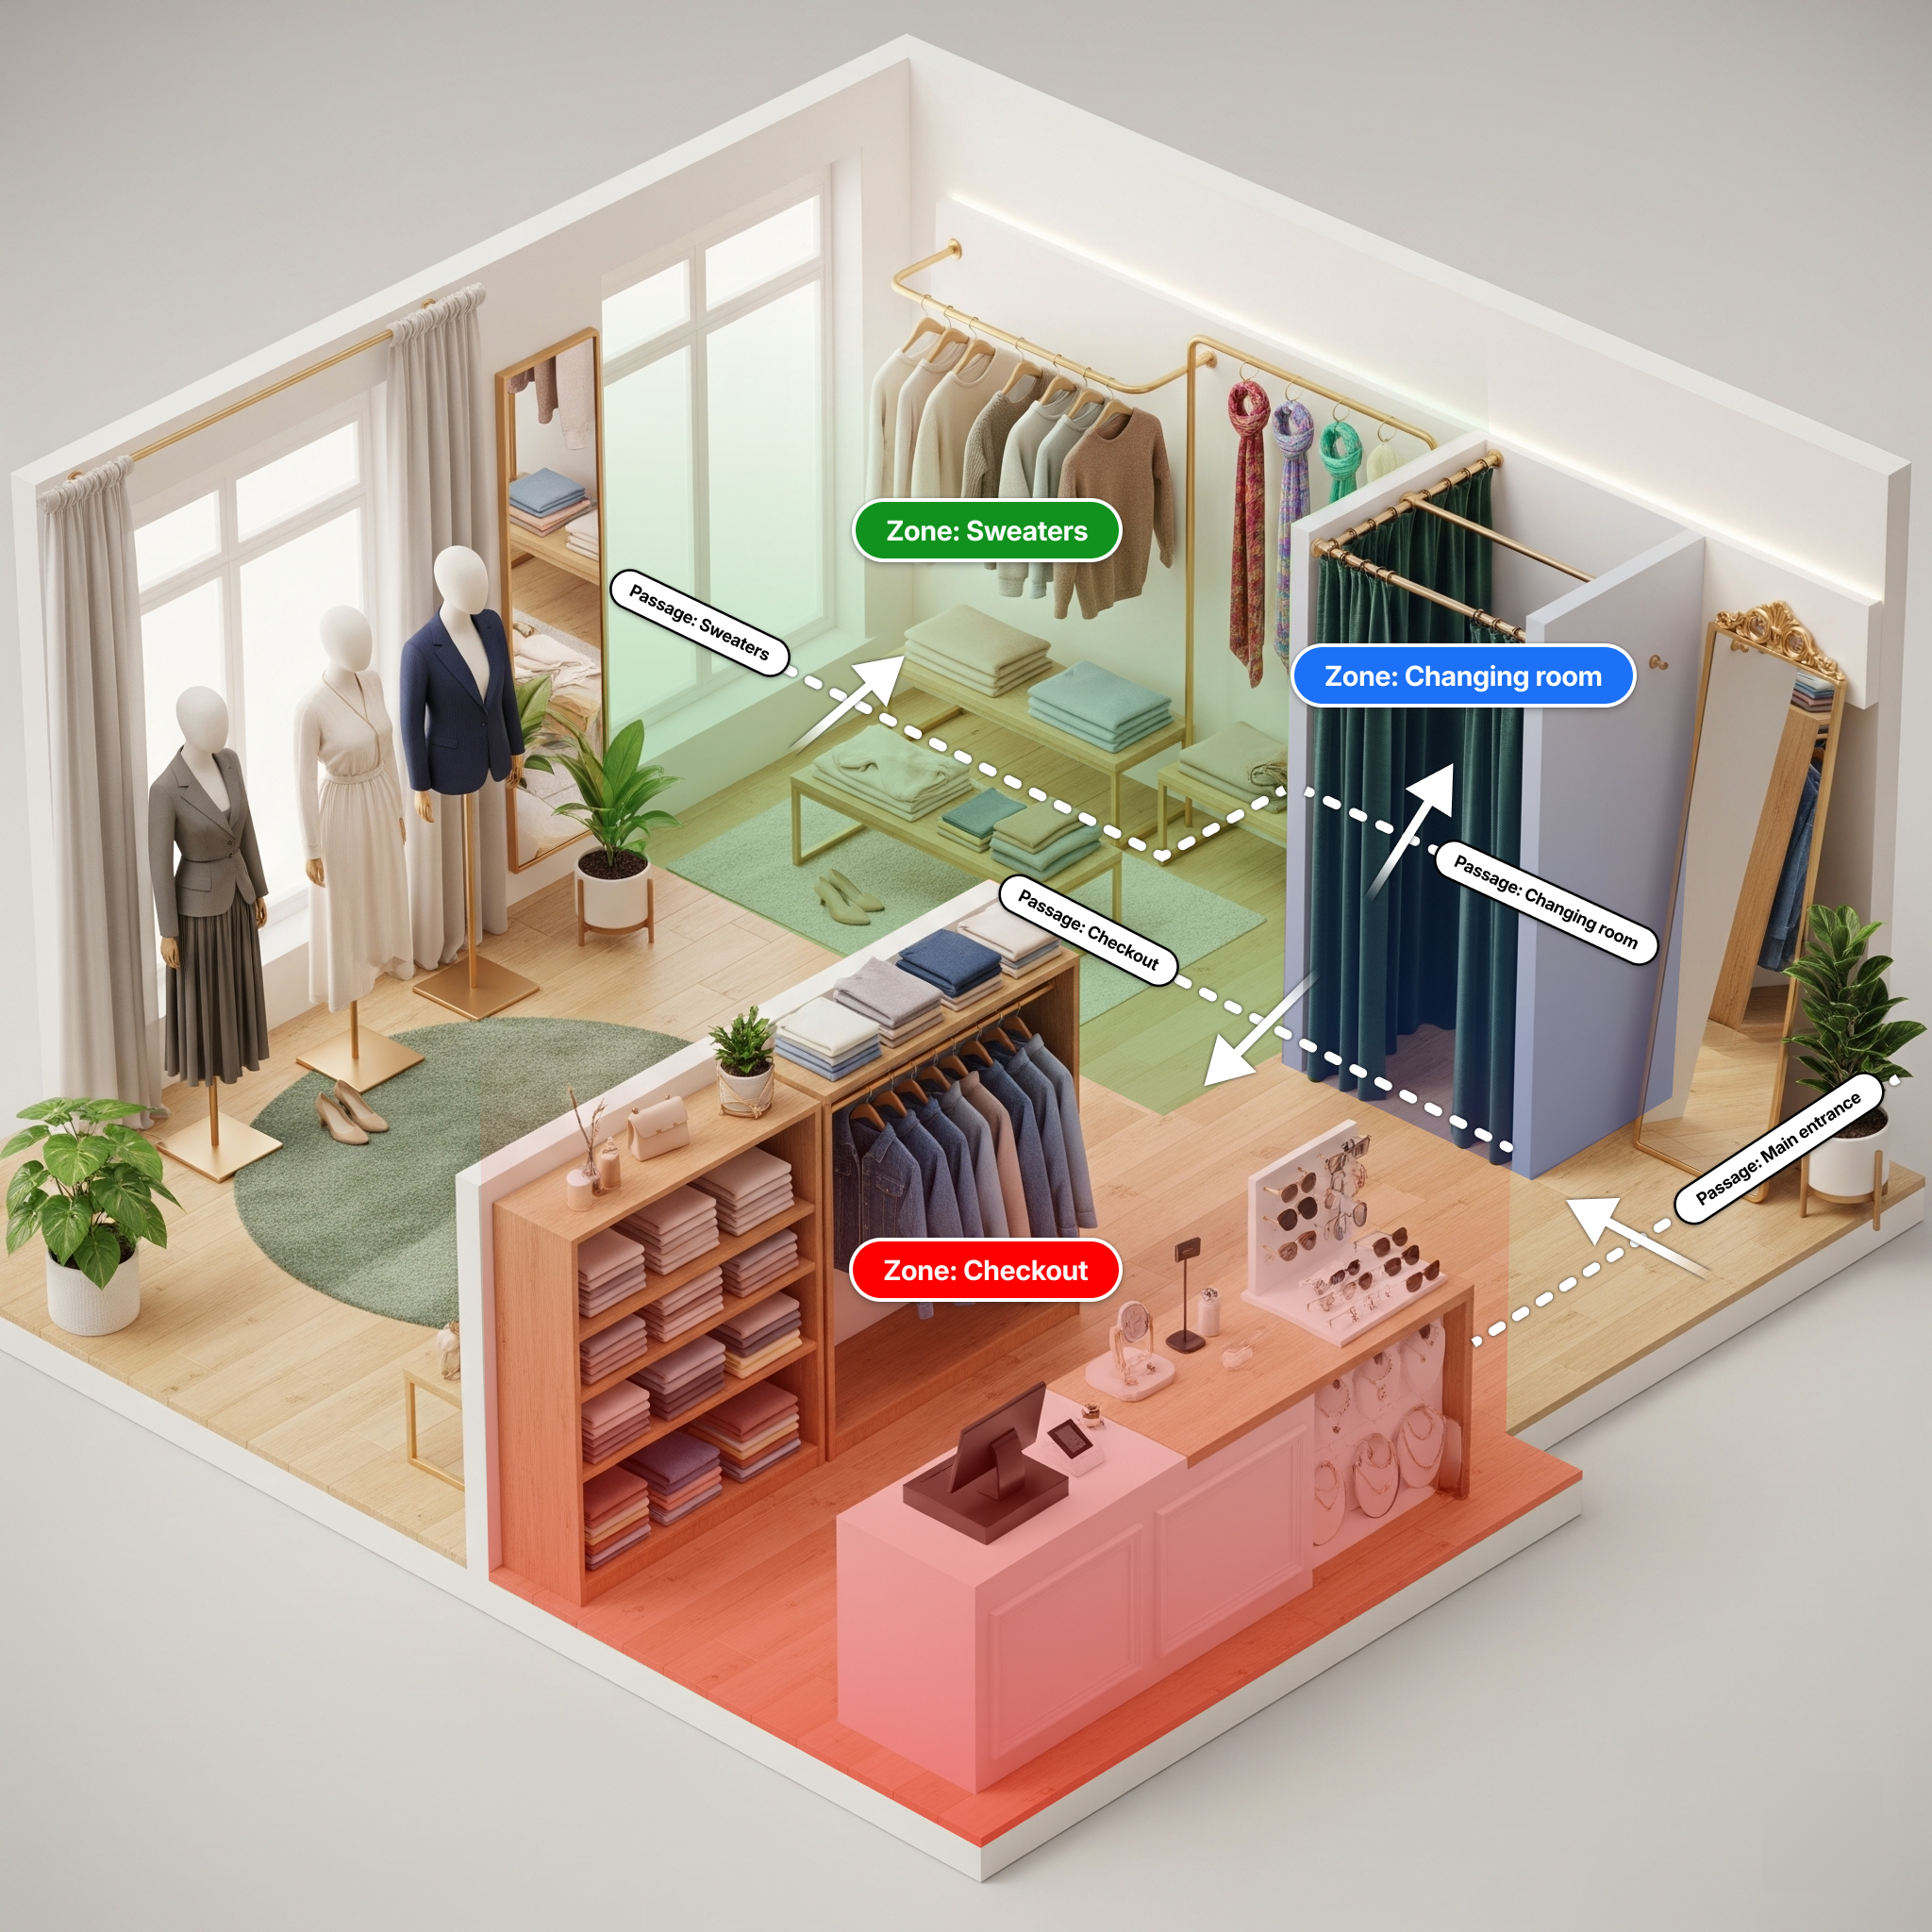
- Site (Installation): A real-world location such as a building or an event.
- Zone: Subdivisons of your site. Examples: floors, rooms, or desks.
- Passage: Connection between two zones. Examples: doors but also any logical separation between two zones in an open area.
While passages in real-life allow people to move in any direction, in Technis a passage has a Counting direction. The counting direction lets us identify entrances vs exists between connected zones.
Together with the data from counting sensors we can identify:
- Number and direction of people traversing a passage
- Number of people in any zone, via connected passages
Note that movements between sub-zones can inflate certain counts, as we do not track individuals.
Creating a new Site
1. Go to Settings > Sites and click New site.
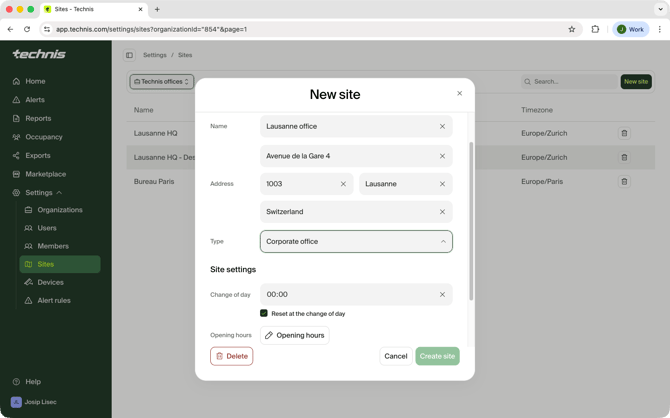
2. Fill in the site details:
Name and address: Site name will be used across the platform, so keep it clear and concise.
Type: Select a category of your site. If none of the provided categories match, select "Other".
Change of day: defines daily metric reset. If your site or event is open during night, change the value to match your closing times. Charts with hourly granularity will start at this time.
Opening hours: if your site has specific opening hours or multiple opening periods during the day define them here.
Processing tasks: Choose which types of metrics you want to be calculated for your site. Note that the availability of metrics depends on your plan and devices installed on your site.
3. Click Create site once you have confirmed everything is correct.
Zones: Structure your space
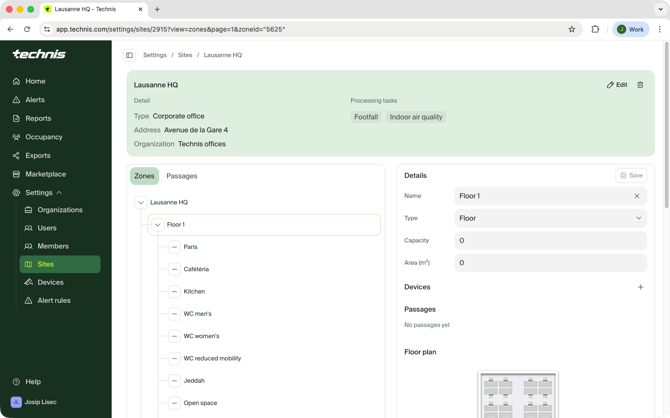
Zones represent logical areas of your site. These can be high-level (eg. "Ground floor") or very detailed (eg. "Conference room 1", "Welcome desk").
- In the Zones tab, add new zones and sub-zones to reflect your physical layout
- For each zone define type, and optionally capacity and area in m2. Type and area are used only for informative purposes.
- For each zone where you want to monitor indoor air quality, you can link a supported device.
For zones with capacity set, Occupancy metric will be automatically calculated.
Passages: Connecting zones
Passages are the key to accurate counting. A passage is a path between two zones, and is typically the place where you will install a sensor or the area that sensor will observe to determine movement of people.
- In the Passages tab, create your passage by giving them a name
- For each passage define the counting direction. Movement of people in the specified direction will result in number of entrances being increased in the "To" zone and decreased in the "From" zone.
- For each passage you have to assign one supported counting device.
For passages that are connected with zones that are not covered by sensors, you can use "Outside" as the destination.
Each site needs at least one passage that's coming from Outside to any inside zone.
The counting direction must match sensor's configuration and orientation. If reversed, entrances may be logged as exits and vice-versa, leading to incorrect data.